Note: before starting this tutorial, you must have completed the tutorials associated with topography processing.
The WaterSed model can simulate four types of soft hydraulics : fascine, hedge, grass strip and pond/buffer basin.
1. Layout of soft hydraulics
Create the PLANNING folder in the TUTORIAL folder.
Launch SAGA GIS
Import flow_accumulation.sgrd and hillshade.sgrd (produced during topography processing tutorials). Right-click on hillshade, then Add to Map. Repeat for flow_accumulation.
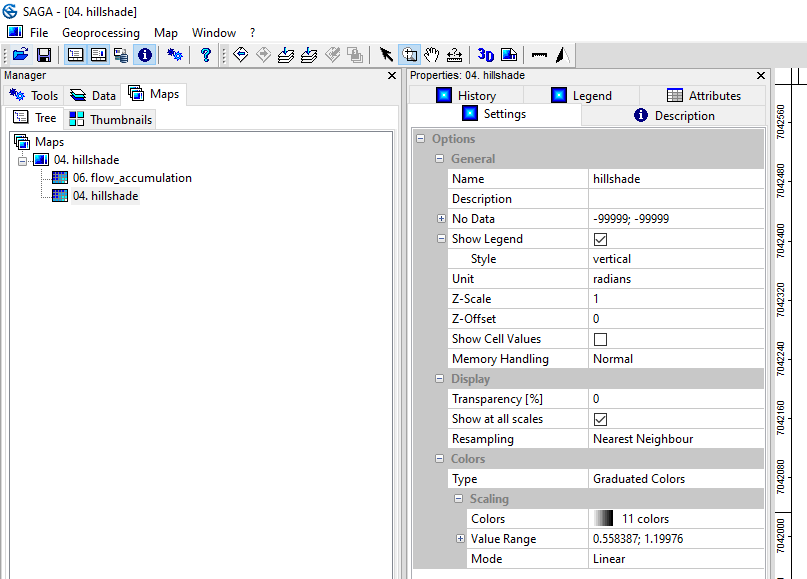
In the Map tab, flow_accumulation should be in first position and hillshade in second. Click on hillshade in the Maps tab. Change hillshade‘s color palette and select greyscale in the Settings tab, then the Colors menu, Scaling then Colors […] and finally Presets. Click on Apply.
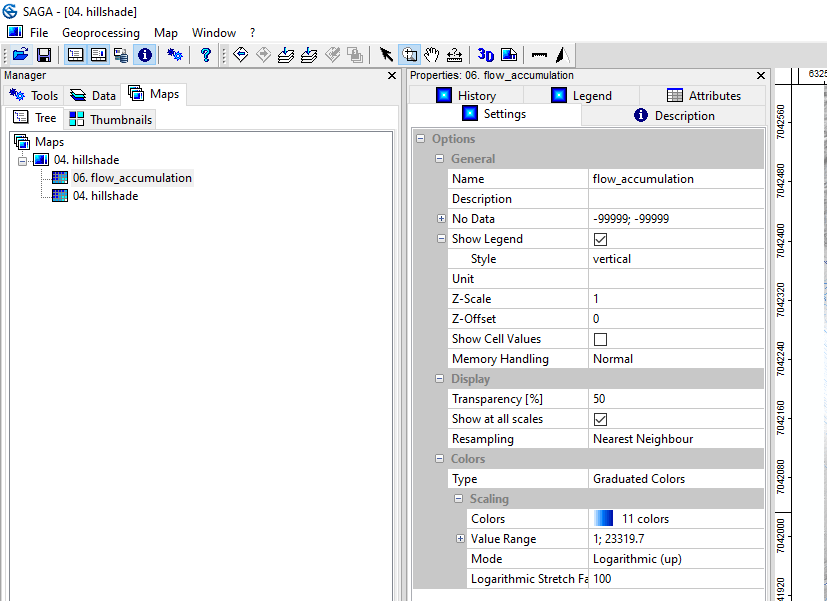
Change the flow_accumulation color palette to white > blue. In the Mode menu, select Logarithmic (up). Replace Logarithmic Stretch Factor value 1 by 100. In the Display menu, change Transparency [%] to 50%. Click on Apply.
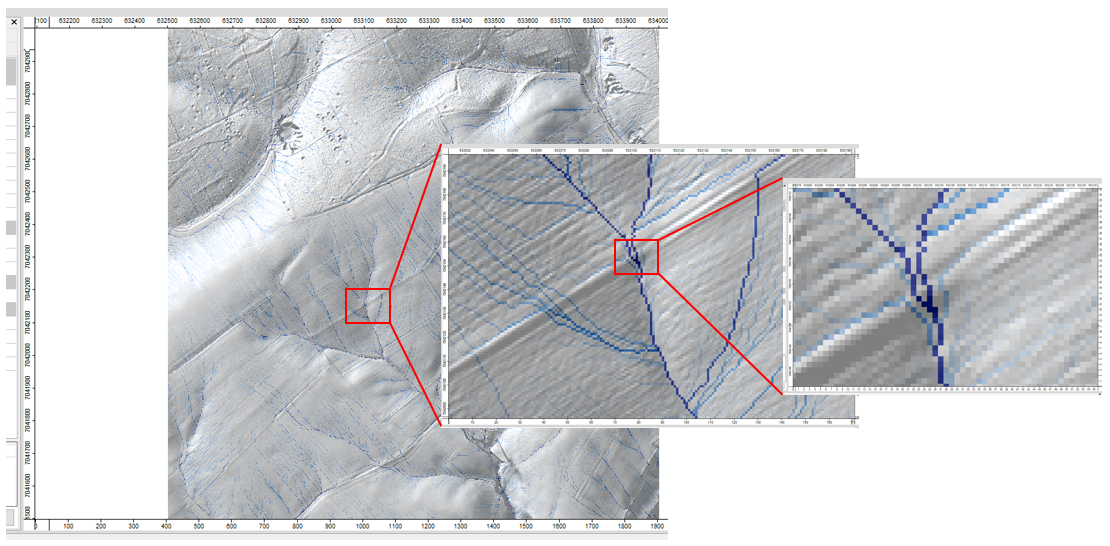
This type of display makes it possible to visualize both the shape of the landscape (slopes, agricultural plots and their boundaries, ditches, etc.) and the organization of the runoff network. These two grids will serve as a basis for the positioning of developments. Of course, other grids can also be used, depending on individual preferences.

In the WaterSed model, each type of development has a unique identifier in the form of an integer ranging from 1 to 4 :
- (1) : Fascine
- (2) : Hedge
- (3) : Grass strip
- (4) : Pond / buffer bassin
Note: the method suggested below is only a suggestion. All methods are valid as long as the meshes are coded from 1 to 4.
To positionsoft hydraulics, define a NoData grid (-99999) and replace the NoData values with the desired soft hydraulics identifier. To define a NoData grid :
Tools Tab <> Grid <> Tools <> Constant Grid
In the Name menu, replace Constant Grid with id_amenag. In Constant Value, replace 1 with -99999 (NoData). In Target Grid System, choose grid or grid system and select the Grid System of hillshade and flow_accumulation. Click on Okay.

The grid appears in the Data tab. Right-click on id_amenag then Add to Map. No changes appear on the map, as this is a NoData grid (NoData values are transparent in SAGA GIS).
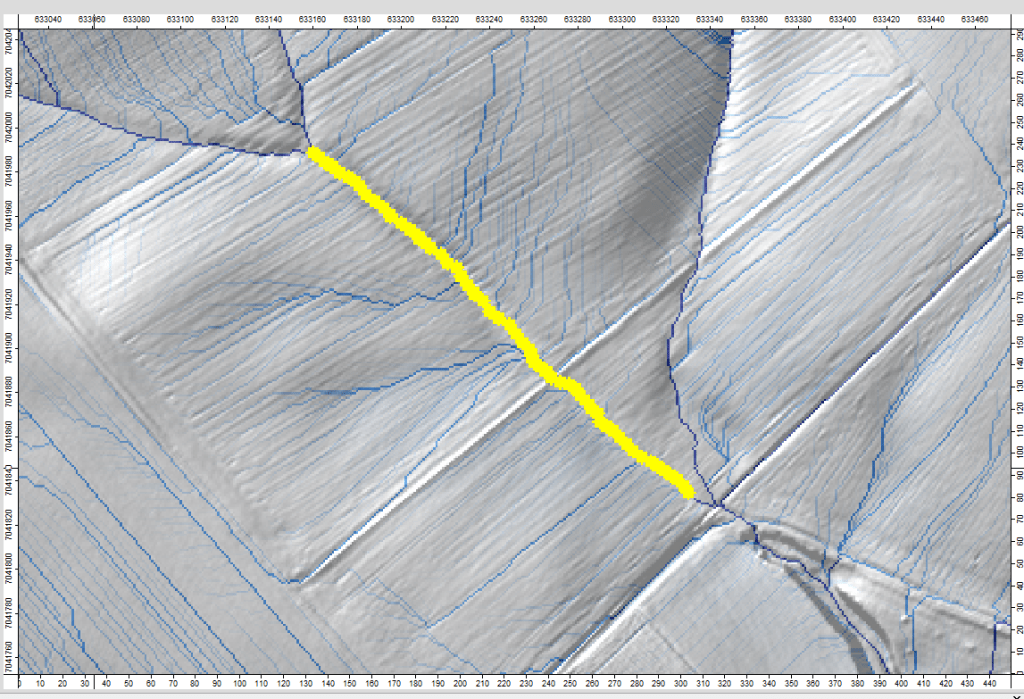
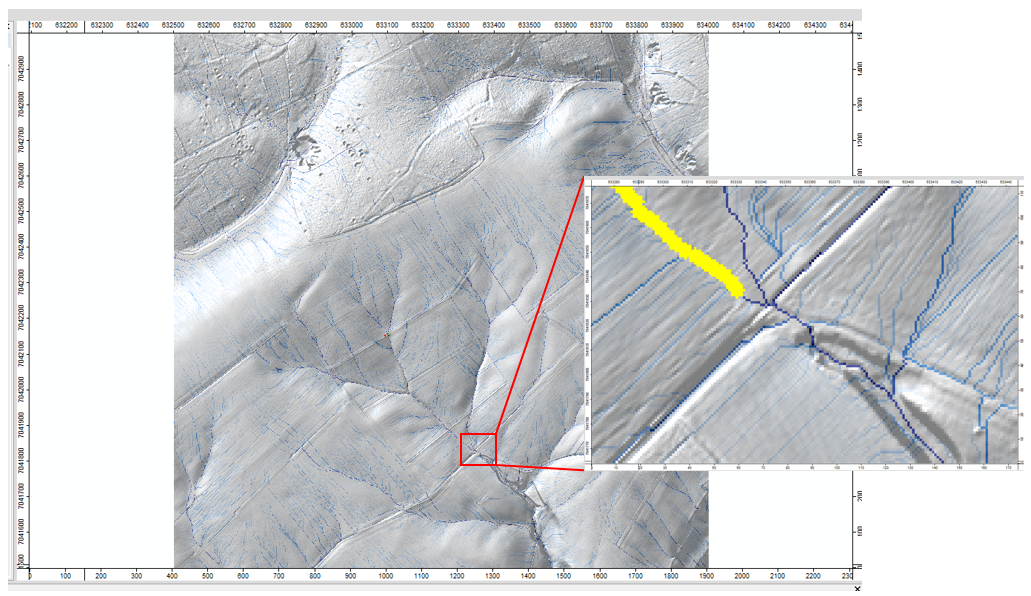
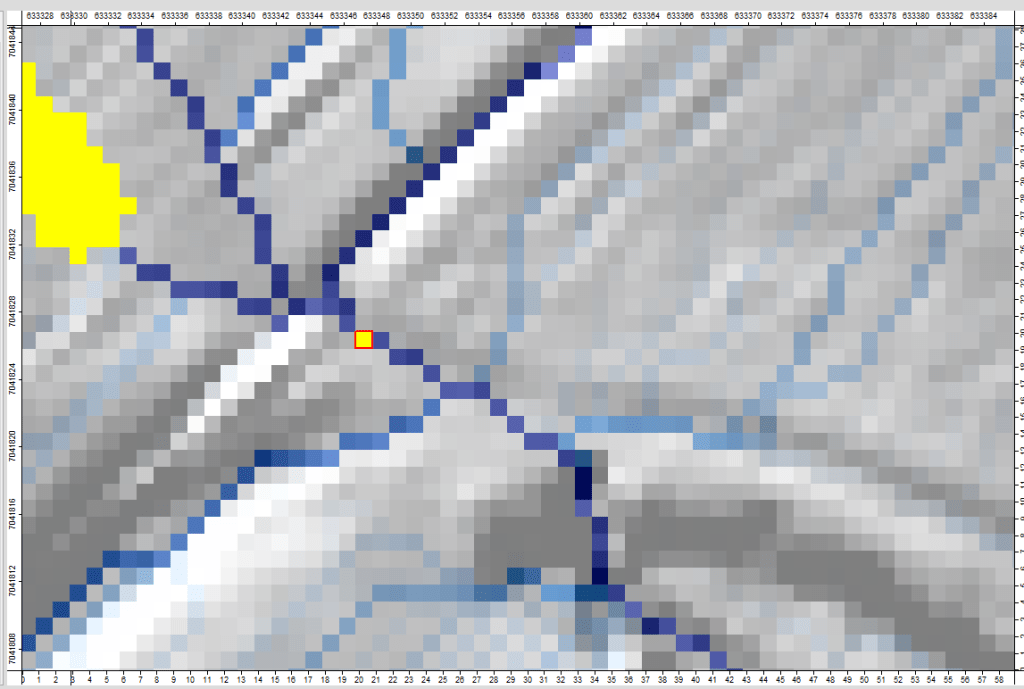
Zoom in to the plot boundary shown on the map below:
In this example, we’ll position a fascine at the intersection of the two runoff axes and the plot boundary. To position a fascine on a given cell, simply replace the value -99999 by the value 1. To edit a grid, use the Change Cell Values [interactive] tool.
Tools tab <> Grid <> Tools <> Change Cell Values [interactive]
Select the id_amenag Grid System and point to id_amenag in the Grid menu. In Value, replace 0 by 1. Click on Okay.

Select the action arrow.
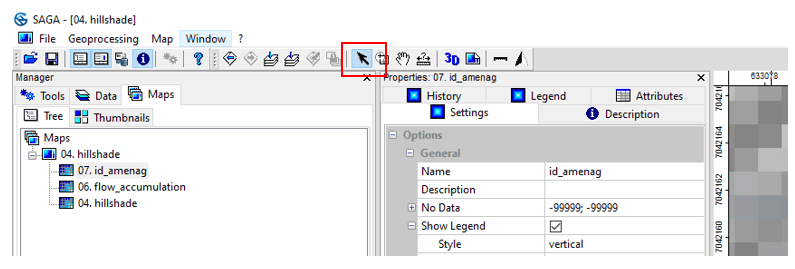
On the map, position the cursor on the cell chosen for the fascine and Left-click. The mesh changes color (dark blue by default), meaning that the value -99999 has been replaced by 1.
For practical reasons, replace the dark blue color with yellow. Click on id_amenag, then in the Settings tab, replace Graduated Colors by Single Symbol in the Colors, Type menu. Then choose Yellow in the Single Color, Type menu. Click on Apply.

On the map above, a fascine has been positioned on the runoff axis running alongside the directional plot. A total of 4 runoff axes are recorded at the fascine location. Four fascine cells therefore need to be positioned to intercept all runoff.
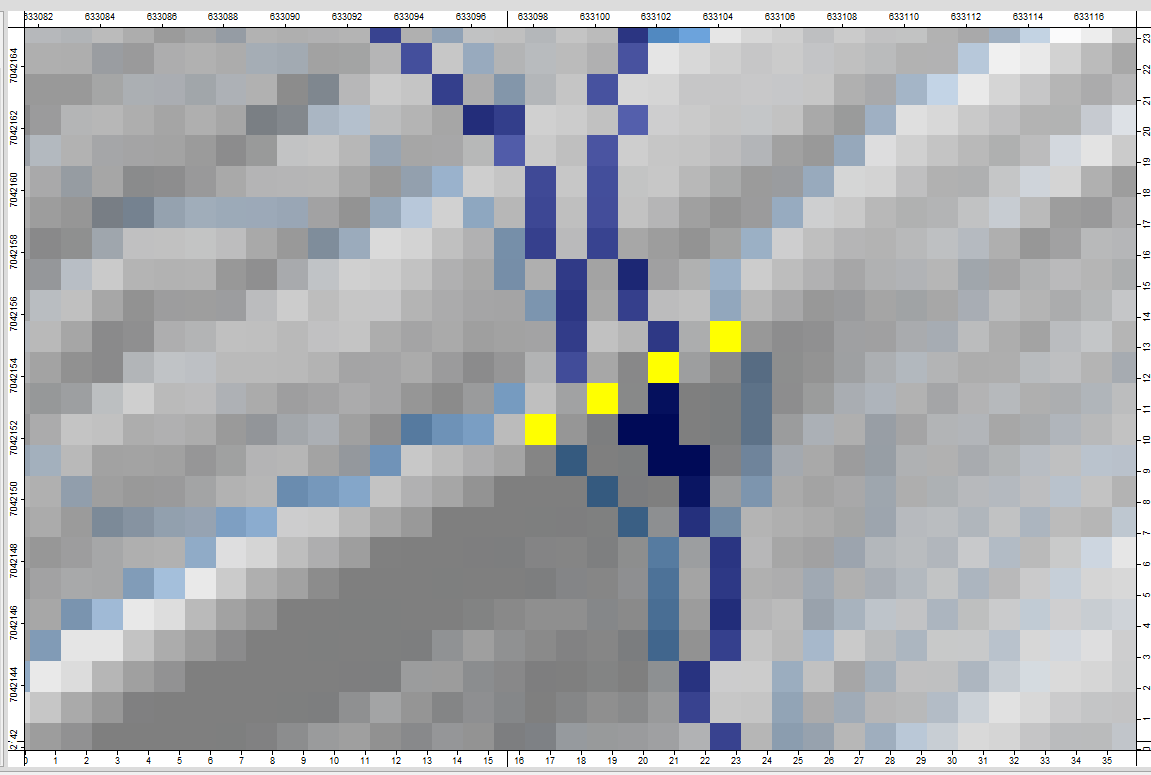
As the fascine is a linear object, the « gaps » between the cells can be filled and the fascine widens on either side of the runoff axis.
Warning: never place two fascine (or hedge) cells in a row on a runoff axis. The model will interpret two cascading fascines!
To stop positioning fascine cells, click on Geoprocessing then on Change Cell Values [interactive].

In the event of a positioning error, simply replace the value 1 with the value -99999, either using the Change Cell Values tool [interactive] (replace 1 with -99999 in the tool) or via the Attributes tab of the id_amenag grid.
At this point, save the id_amenag grid in the PLANNING folder. Right-click on the grid, then Save as…
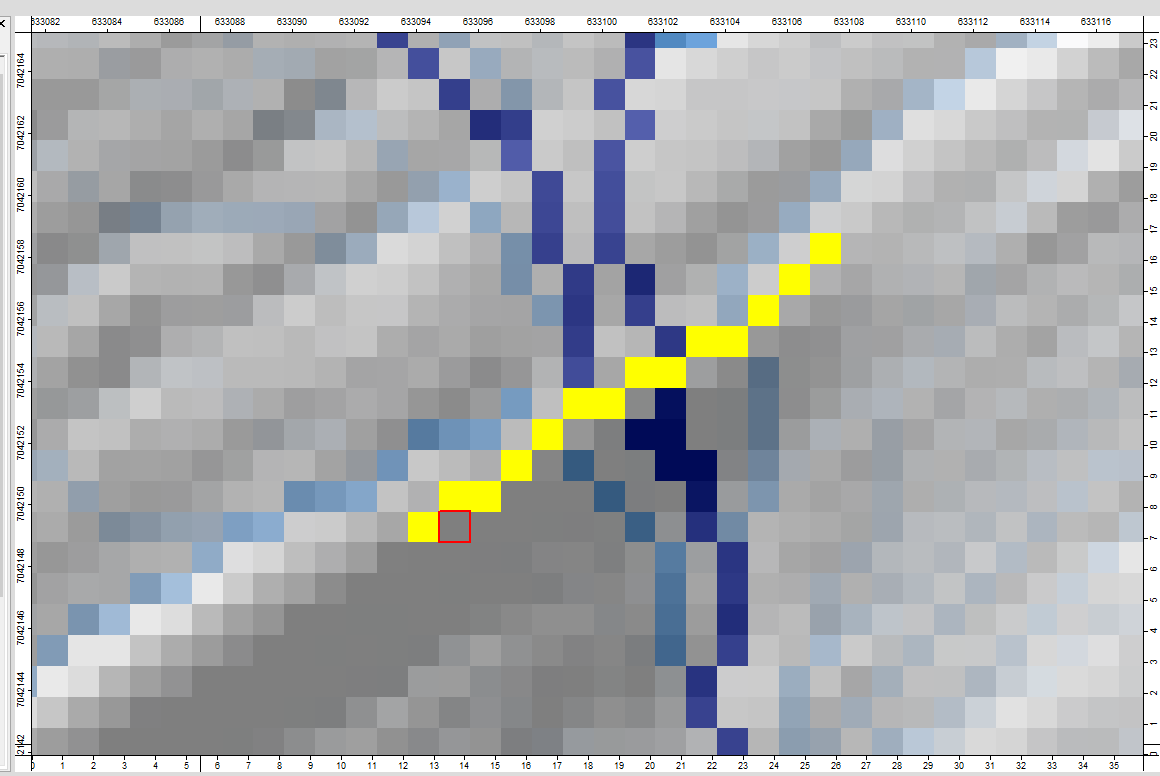
/TUTORIEL/AMENAGEMENT/id_amenag.sgrdWe’re now going to position a 6m-wide grassed strip along the main runoff axis. Zoom in as shown on the map.

Relaunch the Change Cell Values tool [interactive] and set the Value menu to 3. Replace the value 0 in the Radius menu with 3. With this configuration, the tool will assign the value 3 within a radius of 3m around the cell where a grass strip is pointed. Click on Okay and then on the Action Arrow.

Position a grassed strip along the runoff axis. You can toggle between the Action Arrow and the Zoom Arrow. Remember to save regularly. Right-click on id_amenag then Save.
Finally, we’re going to position a buffer basin towards the basin outlet. Zoom in as shown on the map.
Relaunch the Change Cell Values tool [interactive] and set the Value menu to 4. Check that the Radius menu has been set to 0. Click on Okay, then on the Action Arrow. Position the pelvis as shown.
Note: in the model, a buffer basin is reduced to a single cell on which the storage volume is entered. This cell is generally located at the basin outlet (if the structure already exists).
Once the facilities have been positioned, the remaining NoData in the id_amenag grid must be replaced by 0 (the WaterSed model cannot calculate on grids with a NoData value). The Reclassify Grid Values tool is used.
Tools tab <> Grid <> Tools <> Reclassify Grid Values
Load the Grid System and then the id_amenag grid. In the old value menu, enter -99999 (NoData) and in the new value menu, enter 0. Click on Okay. Save the grid under the name id_amenag0.sgrd.

2. WaterSed Measures Generator
The WaterSed Measures Generator tool lets you assign four properties to landscapes :
- Width (m)
- Infiltration capacity (mm/h)
- Manning’s coefficient (s.m-1/3)
- Volume (m3)
Before going any further, and to fully understand the steps below, the reader is invited to take a look at the Module Aménagement page in the Theory tab.
Download WaterSed Measures Generator (WS_Measure.xml) from the Download tab and install the tool using Drag & Drop in SAGA GIS.
Download layout properties and import the properties_amenagements.txt table into SAGA GIS.
Open proprietes_amenagements from SAGA GIS (Right-click then Show). The table consists of a Class column (with a code ranging from 1 to 4) and 4 columns specifying layout properties.
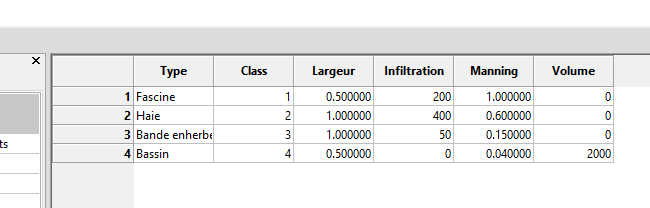
Note: Property values can be modified as required either from within SAGA (Apply to apply changes and Save to save changes permanently) or from a text editor (delete proprietes_amenagements from SAGA GIS, make changes then reload on SAGA GIS).
Note: by default, the properties_amenagements table will assign a storage volume of 2000 m3 to all the ponds that have been positioned. If the storage volume is specific to each pond, you need to manually edit the cells of the meas_volume grid at the output of the WaterSed Measures Generator tool.
As with the WaterSed Input Generator tool, the WaterSed Measures generator tool will build the 4 property grids by reclassifying the facility identifier according to the properties_amenagements table. The tool can be accessed from :
Tools tab <> Tool Chains <> WaterSed <> WaterSed Measures Generator
Load the Grid System in the Inputs / Outputs menu, then enter id_amenag0 in the ID Measure line. The tool creates 4 output grids : a width grid, an infiltration capacity grid, a Manning’s coefficient grid and a volume grid. In the Measure properties menu, load the proprietes_amenagements table. In the Reclassification code line, set the Class column. In the Infiltration capacity row (mm/h), enter Infiltration, Manning for Manning roughness coefficient (-), Width for Width (m) and Volume for Volume row (m3). Click on Okay.

The 4 grids appear in the Data tab. Save the 4 grids in the PLANNING folder.
/TUTORIEL/AMENAGEMENT/meas_infiltration.sgrd
/TUTORIEL/AMENAGEMENT/meas_manning.sgrd
/TUTORIEL/AMENAGEMENT/meas_volume.sgrd
/TUTORIEL/AMENAGEMENT/meas_width.sgrd
